I will be doing Digital Tutors: 2D racing Game Series in Unity: Volume 1
Here is what I have so far:
First we added 5 materials to our Materials folder.

We specified which texture would be assigned to which material, by navigating
through the Photoshop texture sprite sheet and finding the matching material.

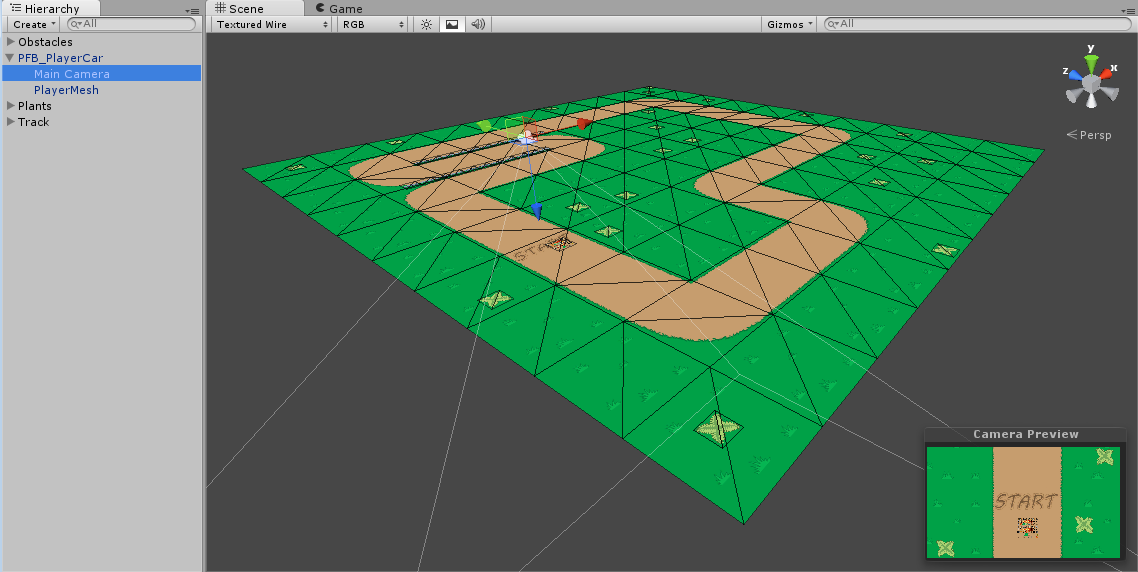
Once we dragged and dropped the the created material onto a quad (a plane created in Unity),
We went into our prefabs folder and created all the track prefabs. Dragging and dropping a
completed material in the hierarchy onto it's corresponding prefab name
created a prefab with all it's attributes.

We added other prefabs like grass, plants, and stone dividers to our prefab folder.

After that we added a player prefab which consisted of the whole sprite sheet texture. The reason
that the player car needed access to this was because it would need to navigate through it to the
different driving frames needed depending on moving forward, turning, etc.

Using Unity's scripting interface called "MonoDevelop" we created a short
and simple script for player movement (this covered only forward and backward motion).
After that we continued to develop the player movement script by adding in turning functionality.

We didn't want to have the car drive at a consistent speed. We wanted to have acceleration/velocity
values. So we started adding in some velocity functionality.

In the following lesson we finished the movement script and debugged any small errors we may have encountered along the way.

Next we started to write code that would change the sprite spreadsheet into the correct image
that we need for each appropriate player action. We got it to connect to the sheet and
ended the lesson with staying on it's initial sprite value (started with straight path image).
We then had to figure out how to match the sprites with real time fps (frames per second). We got it to function and keep track of real time and then restart it's count down timer.
When the game started Update( ) would call the Handle( ) function which in turn would call
FindAnimation( ) and PlayAnimation( ). Update is called several frames per second and is
always checking for changes in player movement, and in connection, necessary change to
player car sprites. We connected these functions and moved on.

Video 1 of figuring out how to cycle through sprite animations.
Video 2 of figuring out how to cycle through sprite animations.
Video 3 of figuring out how to cycle through sprite animations.
This lesson was easy to follow along and Joshua Kinney (tutor) tried to explain the process in a brief, but clear fashion. I would recommend it to others who are interested in making games in Unity (like I am). If you have a subscription to Digital Tutors you can follow along in the following volumes to go further in the project. I might just go back to it someday.
Check out my other blog posts if you are interested. I am working on a space racing game with completely customs assets.