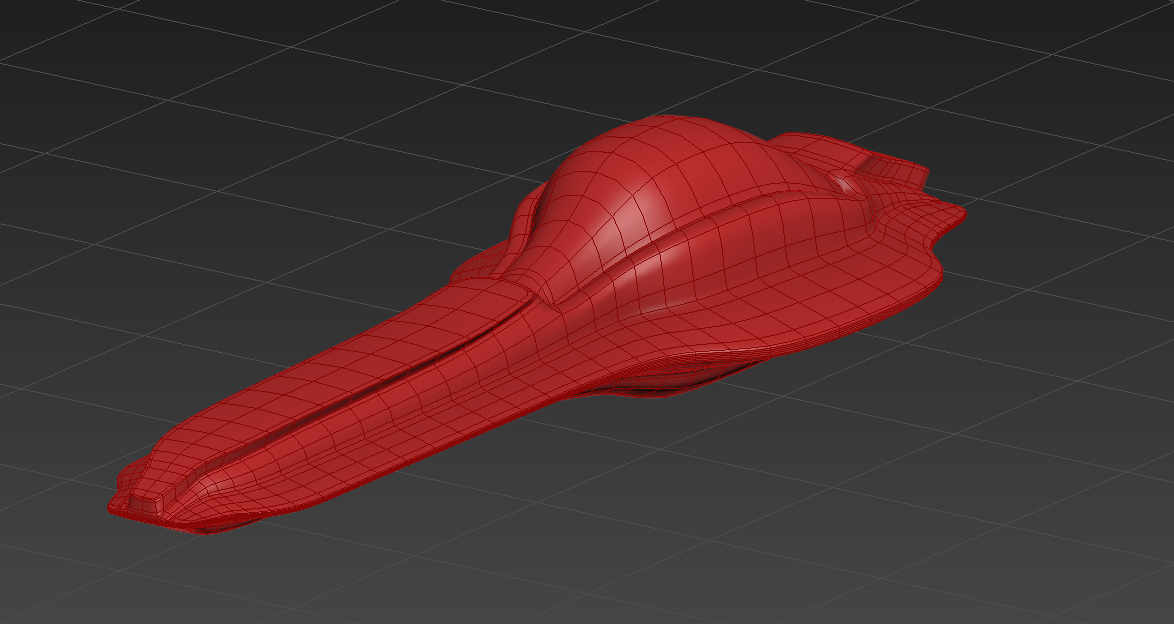
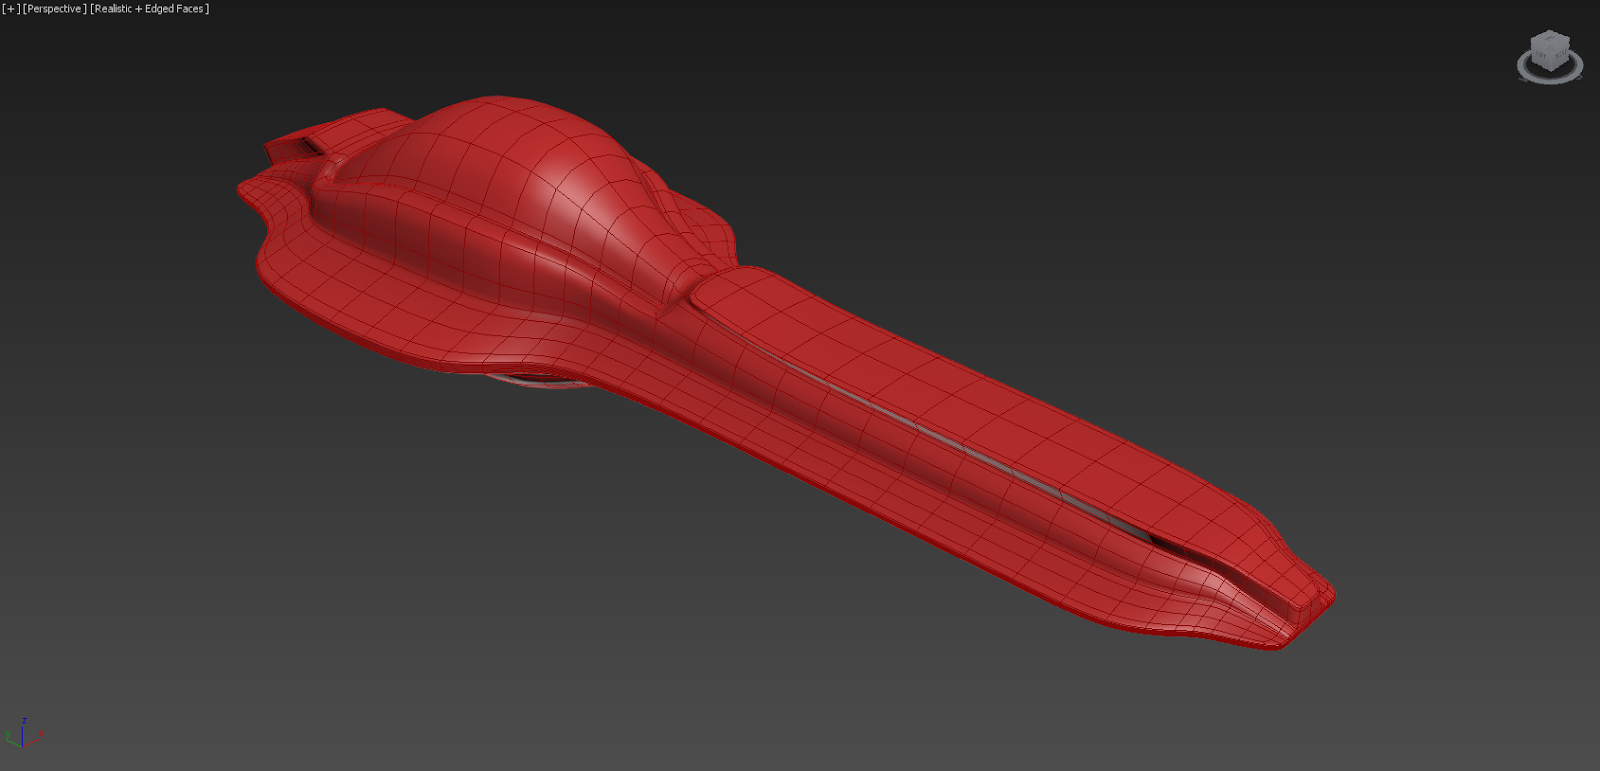
I looked at some examples of sci-fi architecture and race tracks on games like F-Zero and WipeOut and I saw that the track models, for the most part, looked pretty simple. Just standard walls and roads of differing shapes and directions. I noticed that lots of sci-fi space craft and buildings are very geometric, but the edges are smooth. Here is the track that I built.
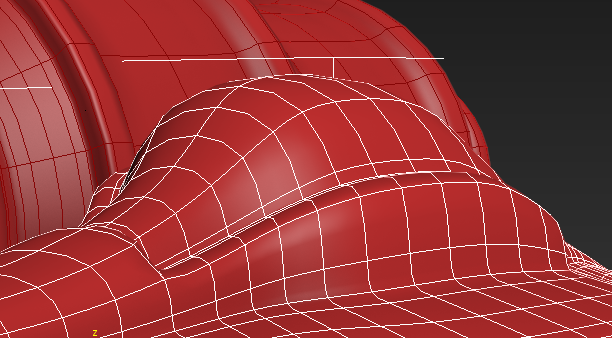
In the beginning I started to build the straight track piece using a planar modeling approach, but I ran into various problems. So I started over with a cube instead and added a lot of edgeloops and extruded a bit.

Here is the track piece from various angles.


Then I started working on the bend piece. This piece only took about about a minute haha. I used the Bend modifier on the straight track piece.


I read an article about Skyrim's modular level design on how they built a specific number of pieces and then reused them over and over again in different configurations to build the game. I wanted to do similar with the track pieces. I want to make a specific amount of track pieces and then be able to connect them in Unity 3D is different configurations. As you will soon see. I have been running into some problems with this.
I then decided to make a ramp out of the of the straight track piece with slight modifications.


All of this worked so far because of all of the pieces being built from the same base track piece. In Unity everything fit seamlessly together, just like I was planning.


But things started not fitting seamlessly once I started making the tunnel pieces. In order for the sides of the track to seem to flow seamlessly into a tunnel I started making an archway piece.


Things still worked even then. I was able to fit it to a straight track piece seamlessly. I then decided that since the archway was for the tunnel track piece anyways that I should just make them one piece.
It took some doing and I had some problems with welding and bridging the the pieces together, but I was finally able to do it and made sure that the tunnel had the same amount of edges as the straight track piece. Originally, I didn't have that many edges, but I ran into problems when I tried to use the bend modifier; so I had to rebuild it.


This piece also connected correctly.

Then I built a straight tunnel piece duplicating part of the tunnel entrance. It connected, but only on on side. You might think that would normally be fine, but I started running into problems once I turned the piece into a bend tunnel.


The piece looks simple enough right? When I imported it into Unity it connected only on one side.

Then I flipped it over to see if I could connect it on the other side. Now note the fact that I took this straight piece, cut it in half, and then used the mirror modifier; so each end should be exact the same shape.


The bottom of the opposite side connected seamlessly, but the edges were always a little bit off no matter how many times I tried to connect it.
I made the bend piece from this same straight tunnel.


Because of this, I had the same issues in Unity. Also I could only make the tunnel turn to right, not to the left.
Problems Connecting Left

Connects If You Try Make the Tunnel Bend to the Right


Wow! It has been about a month or more since I last updated my blog sorry everyone. A lot has been added to this project.
First off I was able to fix the "seams not matching" problem. I went back to the original tunnel piece and found that the left side and right side of the model didn't match (lines and vertices), so I cut it in half and then used "mirror" on it and then "bridge" to connect the middle (you can also mirror them and weld the vertices, but sometimes bridging them works faster; "symmetry" works too).
Once the initial piece was fixed, everything else that I built using that base mesh worked correctly.
Okay, I will try not to be too long in my explanation of the following pieces. With some of them I had major problems while building the models and ended up learning new tools because of it. Here are all of the current pieces right now:
Straight Track Piece
(Made with a box and extruding.)

Curve Track Piece
(Used straight track piece with a bend modifier.)

Ramp Track Piece
(Used 2 straight track pieces. Rotated one 30 degrees. Deleted all but a small portion of the 2nd piece and then welded it (horizontal) to the rotated track piece. (Oh this may have been confusing; this is actually two of the completed ramp track pieces. I made it so that I could make the ramp as long as you want with and then connect the ramp pieces to a straight track piece))

Tunnel Entrance Track Piece
(Used 2 straight track pieces. One small section to be welded to the archway. For the second piece I deleted everything besides a segmented side and used the bend modifier on it (I had to mirror it later). Once I connected these two pieces then I extruded the border of the archway to make the tunnel.)

Ramp Tunnel Track Piece
(In the beginning I didn't know if I was going to use this piece, but I found use for it in the "Building Model". Selecting some of the faces of the tunnel entrance track piece I was able to rotate part of it into a ramp.)

Straight Tunnel Track Piece
(Once the entrance piece was mirrored and fixed I then remade this piece too. I selected all the faces of the tunnel besides the archway and duplicated the faces. After adding one or two edgeloops I had my straight tunnel track piece)

Tunnel Bend Track Piece
(Used straight tunnel track piece with a bend modifier.)

Slanted Curve Track Piece
(This piece took a lot of time to figure out how to build and required 6 straight track pieces. The hardest part was getting a appropriate angle that a craft could fly sideways without falling over. I used the "bend" modifier, "4 X 4 X 4" modifier, and welded a ridiculous amount of vertices.)

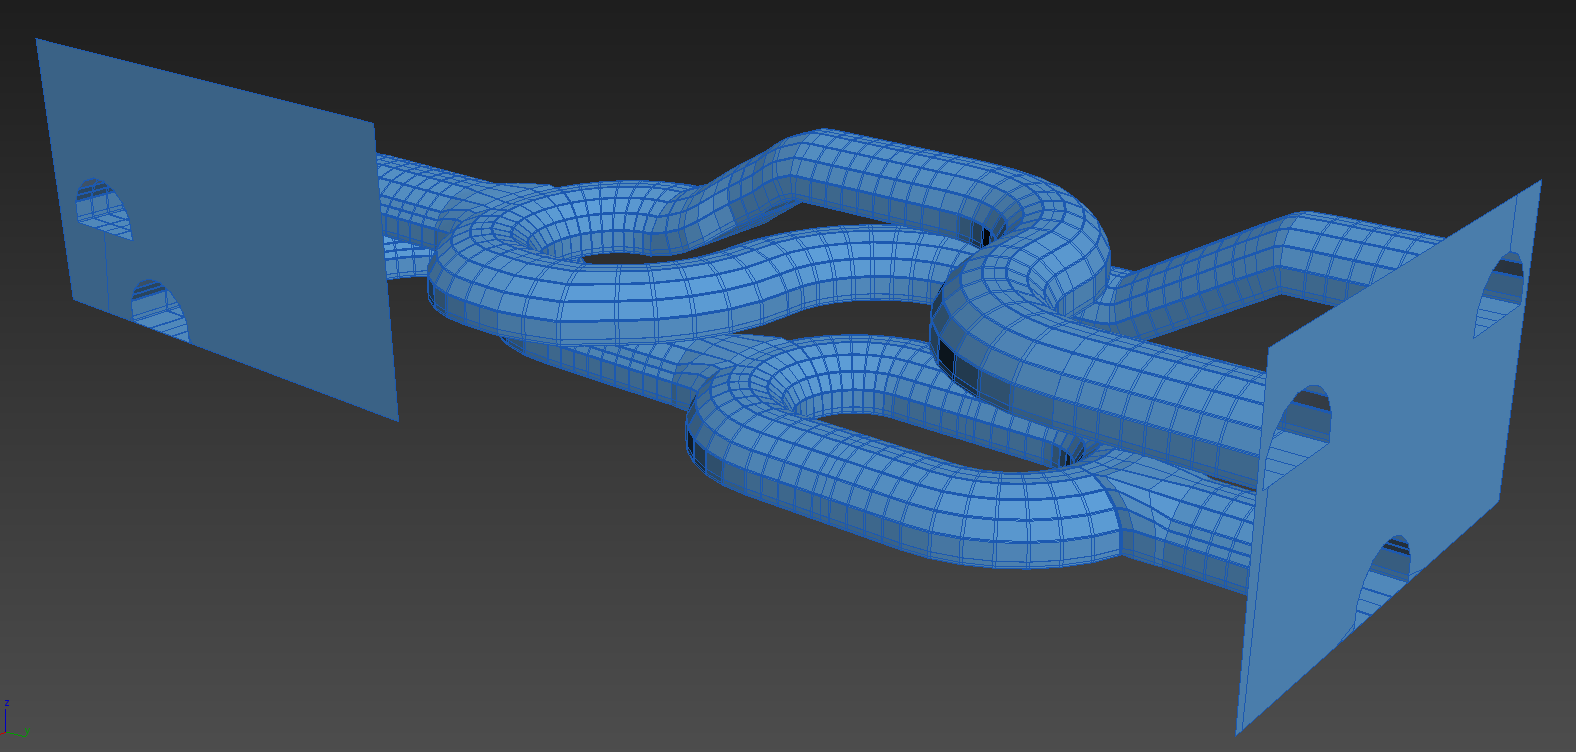
Forked Tunnel Track Piece
(This piece also took a lot of time to make. I used two tunnel bend pieces and a straight tunnel piece. After connect two tunnel bend piece (making a u-bend) I cut a hole in it's side. The most difficult part was trying to figure out how many extra edgeloops I needed to add in order to weld the hole's vertices to the straight tunnel piece. I was able to do it, but it was painful.)

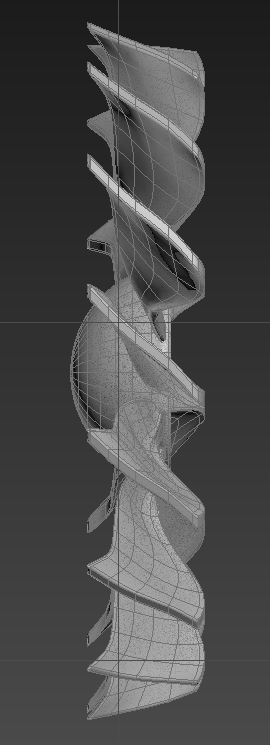
Spiral Tunnel Track Piece
(Here was yet another time consuming project haha. This piece consisted of about 18 (might have been more) straight tunnel pieces. I connected all but two together using modifiers like "mirror", "symmetry", and "weld". I then went to the "shape" panel under "Create" and created an editable "Helix" spline. I proceeded to give it a width about the size of my tunnel and added the amount of rotations I desired. I selected my 16 piece long straight tunnel and (after a lot of research) found and attached the "Path Deform (WSM)" modifier to it. I then clicked "Pick Path" and selected the Helix. After that you use a combination of the "Percent", "Stretch", "Rotation", and "Twist" parameters to get it looking right.

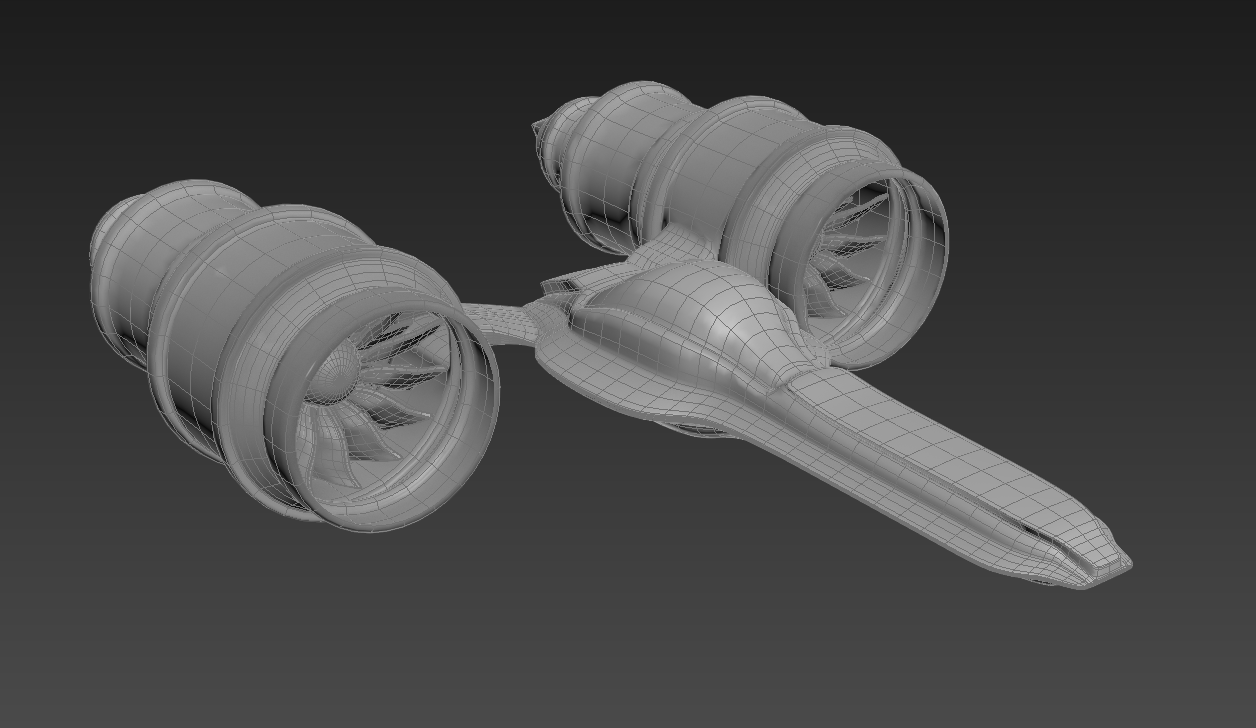
Tri-Tunnels Track Piece
(This piece was composed of multiple pre-built pieces. Most of the time was spent assembling and welding them together. The idea behind it was the player would enter a space building and then choose from one of three tunnels. Two would be would be accessed through tunnel ramps and the other was there just in case you missed the jump. I had some problems building it, but I figured out a solution in the end. I duplicated some of the border edges of all of the tunnels and then used the "Boolean: Subtract A from B" to cut the right shape out of the planes. In order to get the right shape I had to add a lot of extra edgeloops to the planes so that it would cut it out correctly. They are still two separate pieces though so that one can be smoothed (the tunnels) and one can remain a wall.)
Cross Roads Track Piece
(When I was trying to assemble everything in Unity, I ran into some problems with everything connecting properly. Because of these issues, I had to build a specific track piece to connect both ends. For this piece I used two tunnel entrance pieces, one straight track piece, and a lot of patience. It took quite some time (I went through the Sherlock Holmes and Dark Knight movies while I was building it). It wouldn't have been too bad after connecting everything, but things don't always go as smoothly as you would like when you are modeling. After everything was connected there were parts of the straight track piece geometry that turned black. I researched this and some people mentioned problems with the Normals. I tried multiple things to fix it like: 1. Selecting all the faces, going to "Polygon: Smoothing Groups" and clicking "Clear All" and trying "Auto Smooth", and 2. Selecting faces and right clicking "Flip Normals". In the end, the only solution that I found was deleting faces, re-selecting the "border" of the deleted face, and "Cap-ing" off the opening. I guess rebuilding the geometry worked. I have a suspicion on how one might prevent this from happening though, I discovered it while building the next piece.)

Special End Ramp Track Piece
(This was to be connected to the cross roads piece. After building most of the track in Unity, I needed something that would re-align the track's beginning and and its end. So I built a special curve leading to a ramp piece. I used 3 straight track pieces and 1 ramp piece. While building it, I had the piece divided up into 4 parts and when I tried to connect it I ran into problems with the geometry turning black. I examined the pieces and found that the pivot points where all different!! So I decided to individually go through each piece and go to "Utilities/Reset XForm/Reset Transform: Reset Selected". This set all of the pivots to a common default value and when I "attached" them all together I received no black geometry. I am still not quite sure what the problem was, but I was happy that I found a way to fix it!)

For the time being these are all of the models I am going to use. I need to move on to poly-reduction, creating normal maps, UVs, texture maps, and possibly bump maps. This will be step 2. Get ready!!!


.PNG)


.PNG)
.PNG)
.PNG)
.PNG)